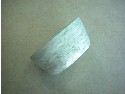
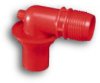


E-Z Hose Coupler
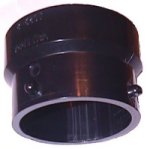
E-Z Coupler Bayonet Adapter
E-Z 90° Sewer Adapter
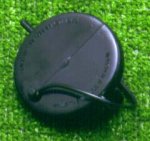
E-Z On/Off Adapter
E-Z Coupler Threaded Adapter
Plumbing |
This page was last edited 12/08/02 |
There are three areas to plumbing normally addressed. One is the sewer fittings, hoses, and other dump (see dumping) requirements. The second is the incoming water supply. Sanitation can be an issue. A third is the winterizing necessary to keep the rig protected. The below items I have purchased in most cases. They are an example only. Additional manufacturers/distributors are also listed for your convenience.
I have also included what Roy and Carol did about their plumbing needs...
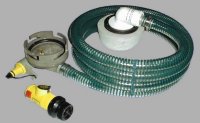
The following adapters and hoses are essential items for the RV. They are 'standard' fittings that work with most RV units. If you travel you will need to have them to fit any possible situation that may come up. It is quite common for sewer variances to exist in camping areas. Some sites 'require' connections that are secure in that they seal the sewer connection if you leave it connected while parked at the site. A complete set of the red adapters here should run you around $40. The investment will make sewer usage and cleanup much easier on the RVer. The sewer hose should run you from $4 or so for the light duty 10' hose to $22 or so for the 20' extra-heavy duty hose.
|
|
|
|
|
E-Z Hose Coupler |
E-Z Coupler Bayonet Adapter |
E-Z 90° Sewer Adapter |
E-Z On/Off Adapter |
E-Z Coupler Threaded Adapter |

Camco Extra Heavy-Duty Sewer Hose, 20'
I've shown the 'extra heavy-duty' version of the hose, although there are three levels
available (standard, heavy-duty, extra heavy-duty). There is relatively little cost
difference and it is suggested that you take into mind that this is one of the items that
you'll be constantly using, either connecting/disconnecting it, and packing/unpacking it.
The stronger the better is my personal opinion. Another issue is the distance
you'll need to go to get to the sewer outlet at the campsite. I've got a 10' hose
and a 20' hose to try to handle all situations. With the connector above to connect
two hoses together, I've got 30' of hose. That should be plenty in most situations.
|
|
This seal is required in some camp grounds. It seals the sewer hose connection to the site dump hole. It cost me less than $3 and I just keep one handy for such situations. |
Camco 39313 RV Sewer Hose Seal |
|
Handy little item to keep on board. This is a repair piece of ABS plastic that is worth its' weight if you have a sewer connector retainer break. What often happens is that the small protrusions that stick out on all sides will break off. Often you can just turn to the best two of four. If you lose two you're sunk. With this you simply remove the other two and use ABS Plastic Cement to glue this piece on. It extends the length about an inch and a half but if you have the room it saves trying to replace a bad y-connector for instance. At around $5 it's a good item to have. |
Another handy item to have on board... for less than $5 you can carry an extra sewer outlet cap. If you're ever had the ear(s) break off a cap you'll appreciate having one of these in the 'extras'. It's cheap insurance. CampingWorld carries a full line of Valterra sewer accessories as will you're local RV dealer if you have one. |
|
| Aluminum RV Drain Stand This is an example of a drain stand that is very effective in keeping the sewer drain tube unkinked and with a steady downhill run to keep the gray water flowing. There are several brands available in several configurations. I bought this one at Wal-Mart for around $35.00 |
|
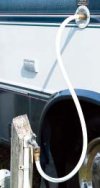
Hose storage:
Your sewer hose is stored in one of several places. The most common is of course the
bumper storage, although there are several other places. Some units come with
storage 'designed' into the unit. In some cases simply throwing the hose into the
compartment on the side of the motorhome is sufficient and in other cases you may want to
purchase/make a hose storage unit such as the one below.
|
26"-46"-64"L E-Z Hose Carrier |
Sewer Solution Model V |
The SewerSolution is a simple, water-powered jet pump with no moving parts. It is designed to both dump your RV waste and to flush your waste system with clean water. The SewerSolution pump and hose are completely self-cleaning! We all share the problem of sewage disposal when on the road. The hose
is messy, the pipes are polluted and there is plenty to see and smell!! The SewerSolution
eliminates the hassles! You can dump sewage without getting your hands dirty or getting
near exposed sewage. Simple and easy to use, the SewerSolution is a great convenience for
the traveling RV. |
Having tried out the Sewer Solution for some time now I'm sold! This is nothing but neat! You've got a clean operation to dump the holding tanks when there is a sewer dump site available. The good part really begins when you find that you're in a line an hour long to get to the dump on Sunday noon when everyone is leaving the camp to go home after a camping weekend. Rather than wait and dump there, it is really neat to be able to go on home and dump when you get home. The same unit above connects to a 1" PVC pipe and will dump quite conveniently into my garage drain. Here's how...
Preparation for the first time includes cleaning out that garage drain thoroughly. Make sure that it is free flowing. I have the standard 2" drain pipe with a garage grate over the trap unit located in the lowest spot in the garage. That's about 20 feet into the garage area in my case. Once you are sure the drain area is clean and running freely you are ready to proceed. Purchase 1" PVC in the amount you'll need to get from your RV sewer connection to the garage drain. According to the folks at Sewer Solution, this should be a maximum of 60 feet. I easily ran two 20 foot sections out to the hose from the sewer solution. 20 foot sections of PVC come with the end flared so they easily connect temporarily to make the 40 foot length that I needed. If yours are not flared then you need simply buy a 1" PVC connector to get the job done. I cut 5" off of the pipe and put a 90o elbow attaching it back to the long piece. (You'll need some PVC cement to complete this task.) What that does is give you something to stick down in the hole to keep the pipe in place while you're pumping out the RV tank. (I put a weighty object on the pipe also to hold it in place.) The flared end of the pipe will accept the Sewer Solution connection or of course you can attach a 1" PVC connector if it is not flared and accomplish the same thing.
From this point you are simply in a situation just like the RV dump station or the campsite you may have been at that was a full hookup. You've got the water, sewer connection and convenience to handle your needs. In fact you'll find that you have accomplished several things here. You've saved possibly wasted time for several people at the campground dump station. You've gotten use of the unit on the way home rather than finding that the unit, if used would be a mess until the next time you went camping and were close to a dump station. Your passengers can now use the facilities on that two hour drive home or whatever it is. And you can clean up at your leisure rather than at the leisure of the campground facilities. Once you've dumped the RV you should run water for some additional time to compensate for the length of the pipe you have and you're cleanup is done. Pull the pipes apart and store them conveniently in your garage and you're done.
How much did I have invested in this setup? I spent a whopping $10 at the plumbing supply and got an extra 20 foot length of pipe. If I had gotten only two pieces of pipe and connectors then the cost would have been maybe $7.50. Any way you cut it... that's a good deal!
|
Toilet tissue seems like a minor issue but it should be noted that this toilet tissue was designed for RV tanks and dissolves properly for the sewer system. You cannot put other items (such as tampons) down the toilet like you would at home. The system was not designed to handle such things. A good quality tissue from your local store has seemed to work fine if the RV version is not available. Consideration should be given the fact that in most RV parks you're going to be on a septic tank. This requires some consideration on your part as an RVer. Particularly Scott's single ply standard tissue seems to work just as well and costs a lot less. On the other end Charmin is not what you want in your RV holding tank or a septic tank. It does not seem to dissipate as well as it should. Use that super soft stuff at home, not the RV. |
Aqua-Soft Tissue |
The following chemicals are standard RV chemicals that are available across the counter. I am now using a chemical that is becoming more popular and is essentially a liquid bacteria. When you think about it you are simply carrying around a mobile septic tank on your motorhome. A septic tank uses bacteria to destroy the tissue and other 'stuff' that goes into the septic tank. The same bacteria will do the job in your holding tanks and it will essentially clean it very well. Particularly you might note that the gauges in your holding tanks do not work correctly all the time. Empty your holding tank. Fill it with water and put in 4-6 oz. of this liquid bacteria and let it sit for a week or more. Drain the tank after that time and my experience has been that the gauges are back to working perfectly. The bacteria will clean the tank, gauges, and all associated parts. Most of these products will also contain something to make the tank smell good. RV-Trine is readily available at your dealer. Go to your hardware store and you'll find a shelf with those products that are used in a home septic tank system such as RidX for septic tanks among others. These products can be kind of pricey and you may find that the hardware store versions will do the job and be a cheaper alternative. I've found that the rvchem.net product was reasonable and effective.
|
|
|
Rid-X as seen at your local hardware... |
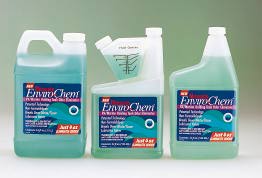
| Enviro-Chem® from Monsanto is the complete, one-step holding tank treatment system. With just 4 oz. this patented technology completely maintains your holding tank with its formaldehyde-free formula. Enviro-Chem® eliminates odors, breaks down waste and tissue while it lubricates valves and cleans tank. Environmentally safer than formaldehyde and more effective than enzyme-based products. Use just one 4 oz. treatment for a 40 gal. tank - that's half the amount required with most other products. USA. |
|
Enviro-Chem® - 64 oz. - 32 oz. with measuring cup - 32 oz. |
|
Camco TST Holding Tank Treatment Gallon All-purpose TST cleans, deodorizes and lubricates sewer systems. Speeds up waste and tissue breakdown. Formaldehyde-free, biodegradable. Reusable pour spout, no messy spills! 8 oz./40 gal. tank. USA. |
What you use in your holding tank to control odor and bacteria is very important. Professionally designed chemicals such as the chemicals above are correct. Any formaldehyde combination is not good for the septic systems. Be cautious as formaldehyde combinations are still available commercially such as the chemical listed below. It is fine to use if you are not dumping in a septic tank system.
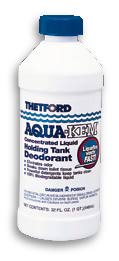 |
Aqua-KemTM Deodorant - 32 oz. bottle All-Season Aqua-KemTM is non-staining. Liquid concentrate eliminates odors, breaks down waste and tissue and helps keep holding tank clean. Biodegradable. 8 oz./ 40 gal. tank. Formaldehyde. USA. |
Toilet Notes:
Most toilets in RVs have two levers that actuate the actual flushing and just putting water in the toilet It is suggested that you use the water fill and bring the water level up before sitting down. This will ease the cleaning of the toilet surface and lessen sticking.
The 'valve' at the bottom of the toilet has a slide that will go into a groove to shut off the flow. If you think you have a leaky valve be sure to use a mechanics mirror and check this groove. Many times a pre-maturely closed valve will catch some paper and stuff it into the groove causing a bad seal. There is a professional cleaning tool for this but a bent rod or screwdriver of the proper size will do the job just fine. Don't damage the seal but clean it out thoroughly.
There is also a seal at the base of the toilet which may or may not need replacing regularly depending on use and care. It is a simple wax seal (may be plastic) much as you would have at home.
Here is an interesting article on holding tank care and maintenance: http://www.rverscorner.com/articles/tanks.html
Problems can be created when RVers use in-coach laundry machines. The extra amounts of detergents and bleach that are used in clothes washing machines do present a problem for a healthy septic system. Only non-bleach whiteners and mild (low phosphate) detergents should be used for laundry in RVs.
Notes:
Don't forget to lube those valves that your use to dump the tanks. They need care also. Thetford, among others, has a valve lubricant available. Another option is to install a Zerk (grease fitting) on each valve near the upper corner (handle end of the valve). Grease it up with petroleum jelly using one of those small hand-operated grease guns A small amount of jelly will come out when you open the valve. It can be wiped off with a rag.
Odors in your RV from the holding tanks are caused by several things. If you have a fan on and no way for fresh air to get into the unit then you may experience odor when opening the toilet valve. Just crack a window so that fresh air can come into the RV. You may also experience odors in the unit when the caulking is bad around the roof vent. You'll need to verify that it is properly caulked. Another source of odor is the gray water holding tank. If the p-traps have dried out after a long storage there may well be another route for odors into the RV. Simply run some water into each p-trap regularly.
Dump sites are sometimes available in the most unlikely places and here's a list of them from RVLifestyle.
Water does not come in one flavor... nor are all campground water services equal.
Several issues are involved from the simplest issue of whether 'potable' water is
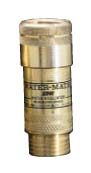
available to what the delivery pressure is. Water pressure should be handled by
purchasing a simple water pressure regulator (I-35 RV furnished one at no charge).
Water pressure regulators come from the simplest example below to a unit with adjustable
water pressure. The Water Mate
|
Water Mate |
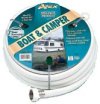
4' Utility Hose
Water Hose 25 ft., 5/8" dia.
Hoses are available from this 4' length to 50' in length. I personally carry several
sizes from 4' to 50' long (4', 10', 25', 50') and find it quite handy to have both the
capability of pulling out the hose for the length that I need and the availability of
coupling hoses together for extra length in that unusual situation that always seems to
come up. Cost ranges from approximately $5 for the 4' hose to $25 or so for the 50'
hose.Top quality drinking water hose is constructed of FDA-approved, non-toxic materials
with no regrind. Drinking water safe. Won't give water any odor or taste. Tire cord
reinforced for superior low temperature flexibility. Corrosion-resistant, nickel-plated
brass fittings and Thum ThingTM coupler for easy connect
and disconnect. Mfr. seven year warranty. USA.
Camco Water Filter Set |
|
I purchased an Ametek water filter and mounted it next to the water inlet in the water supply area. Check out my pictures page for the water closet area. This is a unit that is of sufficient size to handle the constant flow of a service connection into the RV. It has easily replaceable filter cartridges that are inexpensive. Don't forget this filter when you're winterizing the unit. You can simply unscrew it and empty it.
|
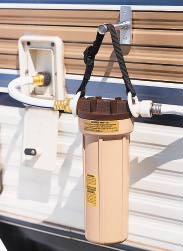
Large Capacity Exterior RV Water Filter reduces
tastes and odors. Attach to RV water inlet with 12" flexible hose (included) then
connect standard RV water hose. Includes NCP-10 carbon-filter cartridge. Filter hanger kit
sold separately. USA. Shown mounted hanging outside the unit. |
Ametek Kleen-Plus® RVF-10 Exterior Water Filter |
|
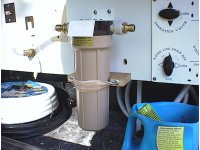
| I mounted the above large capacity filter inside my water closet and then manufactured a brace so that RV travel wouldn't shake it loose or damage anything. I also use the quick connect listed below to connect to it. Virtually effortless water hookup that way and some assurance that the water will be pleasing. |
|
Homemade mount for stabilizing water filter... |
|
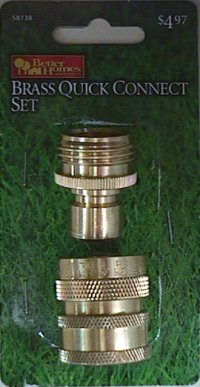
One neat little trick to make life easier is the quick connect for your hoses and other water connections. These are simply a brass piece that screws on the end of your hose connections and allows them to be snapped together. I purchased several sets of these at Wal-Mart for $4.97 a set and now the only place that I have to twist onto a hose connection is the service water connection at the campsite. I strongly suggest buying the brass version and not the plastic version. The plastic is only $1.97 for a set but will not give you the service that the brass set does. This is not a place to save money by getting the cheapest. The RV supplier wanted $7-8 a set. Wal-Mart was the choice here. Every hose, filter, regulator, etc. that I have are all ready to quick connect. Two things are handled at that time I use the quick connect. The first is that the quick connectors eliminate trying to use the thumb tighteners on the end of the hose. Many times you'll see your neighbor camper using a pair of pliers on the hose end. That can only lead to ruin. With the quick connection you're connect time is only a second and you have a good seal. The second thing that as an additional advantage the connection sets that I purchased turn off the water until it is connected. You don't get a lot of overflow in places you don't want it. |
Hot water heaters in most RVs are either Atwood or Suburban brand. They are either 6 gallon or 10 gallon. There are alternatives but I have not seen them regularly installed from the factory. Various models are available that have a standard pilot, electronic lighting, and an electronic pilot with an electric option for when you're plugged in. Most of these heaters require little maintenance. The main thing you want to watch of course is that you properly winterize them. Instructions will come with the unit. Basically most RVs have a hot water heater bypass that allows you to route water around the heater for winterization. You then open the drain plug and drain the unit. That way you don't have to put a large amount of antifreeze in the heater to winterize it. When you open up in the spring you put the drain plug back in and turn the bypass valves to again include the water heater in the circuit. See the manufacturers page for links to these manufacturers.
Notes:
Noise: When your hot water heater is on gas and fires up you'll get quite a bit of noise. That is normal and is the air flow from the hot water heater. The cover over the heater seems to cause this. If you didn't have the cover on you probably wouldn't hear near the noise. That would not be the way to keep it quiet... It is simply part of the operation.
Atwood: There is also an Atwood accessory available that will allow you to modify existing Atwood hot water heaters and put the electric option on it. It is expensive at $185 retail (part no. 91593).
Atwood to Suburban: If you want to change from an Atwood to a Suburban you'll need Suburban door kit that will adapt it to the cutout of the Atwood. It is Suburban p/n 520787. Other than the Atwood cutout being wider, the Suburban is several inches deeper.
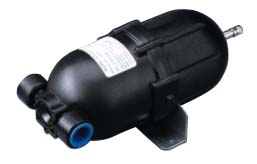
I purchased a SHURflo® Accumulator Tank and placed it into the water supply system. What this tank does is to provide a constant pressure supply to the water system. This reduces the amount of time that the water pump must work. Since it is a demand water pump, it runs each time the water is turned on unless there is an additional pressure source such as the Accumulator Tank. It is preset to 20 lbs. of pressure. SHURflo® produces several products for the RV industry. Such things as built in regulators, water level sensors, water pumps, etc.
Add this compact Shurflo® Accumulator Tank to your freshwater system for smooth, steady water flow. Measures a very small 8.9" x 4.06" x 3.6" but helps end annoying water surge. Pressurized built-in diaphragm (instead of just an air pocket at top of tank) cushion surges to assure a smooth flow. Connects to main water distribution line after sump in demand system. Works with pressures up to 125 PSI. Sturdy nylon housing. Easy installation. Mounts in any position (mounting bracket included). USA. Ship Wt. 1.00 lbs. |
|
Shurflo® Accumulator Tank |
Along with the filters that I use for control of normal water intake in the unit you may want to sanitize the water system when you open 'er up for the season. Purex® Bleach seems to be a good product to use. Put about a half cup of Purex® in each holding tank with the tank about 1/3rd full of water. Put about half that much Purex® in the fresh water tank filling 1/3rd of the tank with water. Take a drive and that will get your tanks 'sloshed' clean. If you feel the urge you can run some of the fresh through the lines by opening each spigot. Rinse the tanks out, of course running fresh water through the water lines, and you're ready to go.
Winterizing is absolutely necessary to insure that the water lines in the RV are protected against cold weather. When water freezes it expands. If it is in the water lines of your RV you'll have cracks and broken fittings to deal with come spring. The usual method of protection is to pump out the water and pump in a form of antifreeze to protect it. You then pour a small amount of the antifreeze into the drain lines to protect them. The RV antifreeze available today is non-toxic and will not harm your systems. You simply run the water a little for startup in the spring, sanitize the system, and the 'winterization' process is removed. Don't forget to remove items from the RV that will freeze at normal winter temperatures for your area. Some food staples will freeze, along with such things as soda pop and other drinks that normally you would want cold, but not frozen.
Winterization is pretty standard with the RV world. You should drain the water lines and tanks. This includes the holding tanks and the hot water heater tank. Isolate such units as the hot water heater, ice maker, etc. This is usually accomplished by engaging a bypass circuit for the water. In my unit there are valves specifically designed to bypass the hot water heater. Then take the drain plug out of the hot water heater to completely drain the unit. The same would apply to other accessories that have a water tank. I went one additional step and put an adapter into the water intake to allow me to put air into the lines and blow out any existing water. After blowing out the lines I put RV antifreeze into the lines. With the Coachmen that I have it was a simple process to turn all of the valves to 'winterization' settings. I then put the intake line provided into a gallon of RV antifreeze and turned on the water pump with the conveniently located switch on the water control panel. That caused the pump to suck the RV antifreeze into the system. My wife then turned on the cold and hot water faucets of each location in the RV so that the red RV antifreeze flowed out. There are three such spots inside the RV (kitchen, bathroom, shower) and one outside that I did (outside shower at the water control area). It took all of 5 minutes to do the whole job. The next step is to put RV antifreeze in each of the drains (kitchen, bath, shower) so that it fills the P traps. Last is to put a gallon down the toilet so that there is a gallon in the black water holding tank, and a gallon down one of the sinks so that there is a gallon in the gray water holding tank. Total of 4 gallons was used for my unit. On some units it is necessary to fill the water tank sufficiently so that the water pump will suck the fluid into the system. Our system has a winterization setting to avoid that requirement.
And yet on other systems it gets a little more complicated and you have to buy a pump such as below and pump the fluid into the system in a reverse fashion. Some older hot water tanks require antifreeze, etc. The combinations are probably endless. In any case you need to verify what your system requires and get it done in time to avoid winter problems. The expense of replacing such plumbing and accessories is definitely not pleasant.
Electrical winterization considerations are also important. The batteries should be kept properly charged. Keep you unit plugged into 110 volt service to maintain the batteries or pull the batteries and put them in your garage on a trickle charger. If you leave them in the unit, remember that the new carbon monoxide detectors draw power 24 hours a day and will drain your battery. A drained battery will freeze and then you're in trouble. Run the generator, if so equipped, on a regular basis to maintain it in a proper state. Generators like to be run. Give them what they want. Put a space heater in the unit and run the generator so that the space heater 'exercises' the generator. That should provide enough draw on the generator to 'exercise' it.
Part of winterization is the removal of your foodstuffs for the winter. Take 'em out and make a list of what you're removing as you do it. That makes it much easier to go to the store in the spring and replace what you've removed. Don't forget that soda pop, can goods, condiments will freeze just like anything else. The bathroom may have some things that will freeze also. Mouthwash and other liquid products make a mess if you let them freeze and break. Take 'em into the house so they can enjoy the warmth also!
One item easily forgotten... batteries in your handheld gear. I mean flashlights, radios, etc. These should not be forgotten. Put 'em in a box together and bring 'em into the house where it's warm. Continued freezing temperatures don't do these batteries any good. You may need to charge them periodically.
|
|
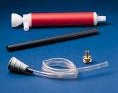
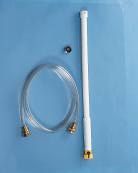
Plastic Winterizing Hand Pump Kit |
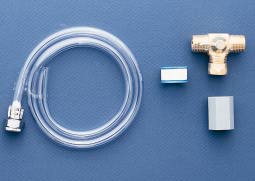
Pump Converter Winterizer Kit |
An inexpensive method to help winterize your RV is to purchase a pump
kit to pump the antifreeze into the system.
Another inexpensive method of inputting antifreeze into your system when necessary is the
T-valve above which, when switched, sucks the antifreeze out of the antifreeze bottle
directly into the system.
Miscellaneous:
|
Holding tank cleanout. |
I have purchased all of the E-Z sewer adapters listed above including the Camco seal. I-35 RV also gave me a 10 ft sewer hose in the start-up kit. I purchased an additional 20 ft sewer hose. I also purchased the aluminum folding sewer hose stand seen above. I also bought the holding tank cleanout. These make the sewer job much much easier. The water regulator was free as a start-up courtesy from I-35 RV, as was a supply of paper. I bought a 4 ft, 10 ft, and 50 ft water hose to enhance my supply of possible hose combinations from the 25 ft hose that I-35 RV gave me in the start-up kit. I am also having a permanent water filter (Amtek) and water softener put in the vehicle. I added a SHURflo Accumulator Tank to relieve some of the pump cycling. We use the Enviro-Chem® listed above and a generic brand of toilet paper. Be sure to hook each hose end-to-end for storage while traveling so that there will not be a problem with little bugs and things crawling into the hose.
Since my initial purchase I have also purchased a Sewer Solution and extra hose length. I have found it to completely replace all of the 3" sewer hose stuff listed above. I will carry both so that I can adapt to any situation but the Sewer Solution is the way to go. It is much cleaner and easier to deal with.
For winterization I simply bought some RV antifreeze and a pressure blowout plug. The pressure blowout was more than I needed but I wanted to completely service the lines and then put the RV antifreeze in. It is a simple process to winterize the unit and the cost is minimal. My cost was less than $20.00 to do the job.
Just how cold is it? Try the Fahrenheit to Celsius conversion below...
Electrical -
Getting power to the right places in the right quantities
Rig - Basic additions to the unit itself you
may want or need
Kitchen - When you fix something to
eat it's just like at home with the same needs
Outside the RV - What you'll need to
enjoy the great out of doors while RVing
Entertainment - Electronic or old
fashioned...
© 1998-2002 Roy Timberman
All trademarks are property of their respective owners.
www.timberman.com