Outside the RV
|
This page was last
edited 04/19/04 |
Your enjoyment and camping experience involves more than just the RV itself. You
should have along some essential items to make the outside experience a good one.
I plan to cover such things as camp lamps, grills, cookers,
chairs, hand axe/saw, awnings,
lighting, mats, etc. Outside cooking is covered in more detail under 'Kitchen' where you'll find many outside cooking
accessories.
Grills
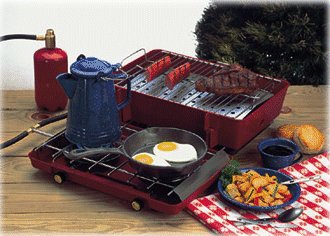
Firelight II grills and cooks like a
regular campstove all at the same time. Compact, portable Grill/Campstove features two
individually controlled, variable temperature aluminized steel burners. Smoker plate
eliminates lava rock for more uniform heat and cleaner operation. Everything operates from
a single propane tank (sold separately). Durable cast aluminum casing with heat-resistant
Green or Red paint. Grill produces 13,000 BTU/hr, stove 16,000 BTU/hr. (8,000 BTU/hr per burner).
Tabletop heat baffle and drip tray for easy clean-up. Ship Wt. 16.00
lbs.
The top and bottom unit separate easily for multiple
configurations and ease of use. For storing they slip right back together.
Ducane furnishes the grill, hose and regulator assembly. All you need to buy is the
LP gas source, and the case listed below if you like. If your local
Ducane dealer cannot provide this unit for you it is available at:
Ducane St. Louis, Inc.
1241 Ambassador Blvd.
St. Louis, MO 63132
1-800-489-6543
314-993-3669
|
 |
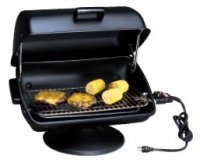 |
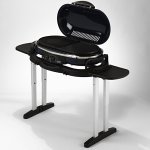
Sear steaks to perfection or cook tender, juicy chicken
on a safe, clean Tabletop Electric Grill. Powerful 1650 watt electric heating element
cooks with efficient infrared reflectivity. Adjustable temperature control and easy-grip,
cool-touch handles. 176 square inch, nickel-plated cooking grid lets excess fat drain away
into handy grease cup to minimize flare-ups and burned spots. Quick warm up - you're ready
to cook in 5-10 minutes. Satin Black steel hood and bowl on pedestal base. 20"W x
12"D x 15"H. UL listed. 110V AC. 15 amps. 5641 BTU. Mfr. one year limited
warranty. USA. Ship Wt. 18.00 lbs. |
|
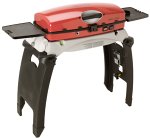
Grill-2-Go - At round $140 retail (srp $249.99) this is quite a nice
grill. It is made by Thermos and comes in a couple of formats.
One is the basic grill and then for a bit more you can have a cooler
underneath it. I have one of these and have hooked up my propane
from the motorhome rather than use those little ol' gas bottles that are
of course always available. Grill-2-Go

is pictured in
the insert. |
 |
|
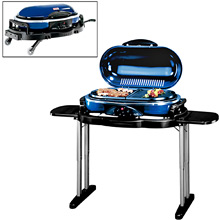
Road Trip LX |
Road Trip Grill - Coleman has a nice grill here to compete
with the Grill-2-Go. Priced around $149 (srp $159.00) you can get
them at the usual spots such things pop up... Hardware and discount
stores, just as with the Grill-2-Go. Two burner gas grill that uses
the bottles, or I would assume you could hook it to your RV propane.
Pictured at left is the Road Trip LX which is srp at $199 |
Road Trip Basic
|
There continues to be a wide selection of nice products out there to grill
on. Keep it simple and use the fireplace/wood burner that I have made
below or buy one of these nice ones to take along.
Chairs
There are many routes to go on your chairs for outdoor enjoyment. We
carry some of those folding chairs that come in a bag and fold up into a very
small area. They are a canvas chair on a metal frame. Sam's and
Wal-Mart has them all the time and they are less than $10/chair. They are
our 'extra' chairs. For your regular duty chairs you should consider
something a little more substantial. Common 'folding lawn chairs' is the
place to go with this. One thing here... get the chairs that have four
individual legs for a base. These chairs will sit much better on the
uneven surface that we have in a campground. They are less likely to bend
and be distorted with the uneven ground. We got four chairs at Sam's for
about $25/each. You get what you pay for and these were nice ones.
The alternative is the cheaper chairs that have a piece of aluminum which is
bent around making a base that runs across making the legs one piece.
These chairs will not 'adjust' to the uneven ground in a campground and are more
than likely not going to last very long.
Hand Axe, Saw
A hand axe, hand saw, or even better... an electric chain saw is an
excellent tool to have along for those campfire needs. A word of caution
here is appropriate. Many campground areas do not allow the harvesting of
wood for campfires. Others ask that you collect wood from specific areas
if they allow it. Cutting down live trees is most certainly a no-no, and
in the case of state parks can be a criminal offense. Simple solution...
ask! If wood cutting is not allowed you will find that there is
universally some source of firewood available at a reasonable cost. Most
state parks I've been in have a wood lot that is open for campers at
predetermined times and the 'bundle' of wood is around $2-$3.
I carry a common hand ax, a camp saw (hand) and a 12" electric chain saw. Very
inexpensive and it's one I had to use around the house for small trim
jobs. Check out eBay and you'll see some real bargains on small electric chain
saws. In many cases such tools are able to double as home/RV tools.
Fires (see Entertainment
Page also)
Having a campfire is one of those enjoyable excursions into the world of
'roughing it' that we all enjoy. Pictures of the group sitting around the
campfire in the early evening darkness telling war stories is something I always
look forward to. Not to mention the warmth on a chilly evening and the
cooking you can do with a campfire. Here's a nice alternative that you can
use when the site you are in doesn't allow 'campfires' on the ground. We
could say this is a 'cooker' or a 'grill'...
 |
 |
 |
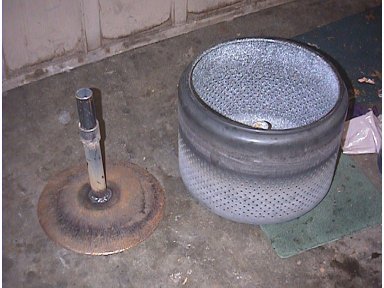
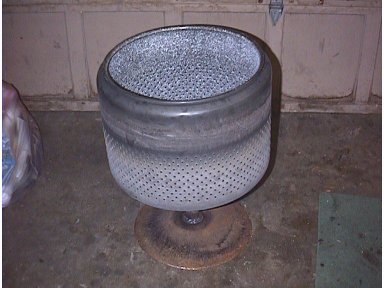
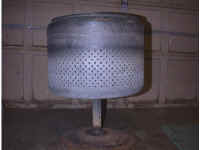
Washer drum on a stand...
No ground fires here. |
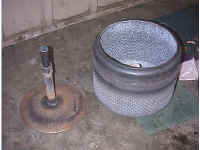
Comes apart for transport...
Store bottom in top. |
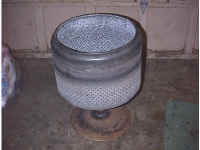
Make your fire here...
and not on the ground. |
Take an old washing machine drum and some pipe along with an old plow disk
and you've got a portable fireplace that is hardy and easy to use. I have
welded the pipe to the plow disk for a base and then put a sleeve on the pipe in
the appropriate place to hold the washer drum just up enough so that it doesn't
get 'stuck' on the pipe. The hardest part of putting this together is to
get the right size of pipe. Plow disks are available at your local farm
implement dealer or a farmer friend. The washer tub came from a local used
appliance dealer that has washers all the time that no longer function.
Variations I've seen on this have the legs welded to the washer tub... which
make it a little harder to store. Or you can weld a pipe base to the tub
and then screw in the legs... which has a problem with the threads on the legs
getting damaged in transit. Put a grill over it and you're ready to cook.
I should mention that there are commercially available 'fire pits' such as
the Pit-2-Go, and the Camp
'n Cook. These are quite pricey at around $130 for the Pit-2-Go to
$466 for the Camp 'n Cook. I had about $10 in my unit above.
Awnings
Many RVs have an awning on the side of the vehicle. The awning can be
a wonderful thing to keep the sun or rain off of you. It can be a
nightmare if it is not put up correctly or it is not taken down when the weather
gets on a rampage.
One of the most popular awnings out there is the A&E Awning. We have
an A&E
8500 and it is about 18' long. When you get this much canvas out there
on the side of your camper you need to properly care for it. There are
usually two supports, one on each end. These supports have a lock which
holds the adjustable awning stabilizer brace inside the main awning support when
you are traveling. Don't ignore these! These locks are integral with
the awning storing system and hold the unit close to the side of the vehicle
while traveling. I have had some problems with them jarring loose in a
high wind bouncing open. What I've done is to put a small 'ball bungee'
cord around each lock assuring that they will not come loose. Another
solution is to purchase a couple of those locking pins that are available.
You will have to drill holes in the supports for the pins to be placed but they
are about as secure as one can get. In extreme conditions I have gotten up
on a ladder and used nylon ties to wrap the lock/unlock lever in place so that
it could not shake loose and allow the canvas to spin off of the roller.

Opening the awning up is a simple process and instructions should come with a
new awning of course. If you don't have those instructions... there are a
few simple steps:
Unloosen the hand tightened knobs which adjust the length of the awning
stabilizer.
Use the hooked awning tool to reach up and move the awning lock on the right
side of the awning to the open position.
Use that same awning tool to reach up and pull the unroll loop down. The
awning should unfurl from the side of the vehicle evenly.
Once in awhile it will stick on one side or the other and you'll need to work
with it.
The awning should be unrolled completely.
The support arms that you loosened will now be free to slide the length of the
main support and lock into the area at the end of the main supports. If
those little gray locks are broken they are easily and inexpensively replaceable
with a kit from your RV dealer.
Pull down on the awning to 'stretch' it tight and then tighten the hand screw
knobs that you had loosened earlier. This should put the awning out
tightly.
The final step is to unlock the handles long enough to raise the awning main
support arms. If you lower one end of the awning you will then have the
moisture able to drain off and keep the awning dry.
You're done with the basics. Here's what you can do additionally...
The awning main support arms will detach from the side of the unit. You
then place them as straight up supports. This will keep you from bumping
your head on them when they are still attached but will also require a little
work.
Do one arm at a time and attach the support arm to the ground with something
such as a stake or an awning arm anchor below.
(Be sure that you have each support arm under control at all times either by
being attached to the vehicle, staked down or having someone firmly holding the
support arm.)
The awning support arm can also be tied down with one of a variety of
stake/spring/rope combinations to fight the wind. Always tie these
straight down and not at an angle. Winds over 20 mph may cause damage to
your awning. Prepare for such winds. It may be nice and quiet when
you leave camp in the morning but the gusts can come up as the day heats
up. Roll up your awning until you return.
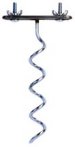 |
Awning Arm Anchor |
|
 |
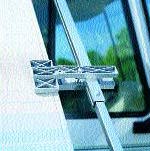
Awning Saver |
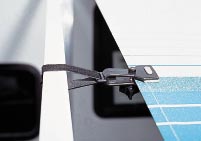
Camco De-Flapper |
Awning Saver clamps or Camco De-Flappers for example (there are a variety available) are used to stabilize the
awning material itself so that the wind won't blow your awning
excessively. This wind flapping can damage and stretch an awning.
It's a good idea to control it. Such clamps typically cost less than $10
and can save you hundreds.
Cleaning: Use a vinyl cleaning product such as Starbright® to clean
the awning. This will clean the awning and keep away the mildew that the
vinyl attracts. You can also use Tilex
as I do. It works just fine.
Repairs: Carefree makes a patch kit for awnings. It is a sheet of
self-adhesive clear vinyl and may or may not do the job you need. Stress
on the area being repaired can be significant and it may not work for you.
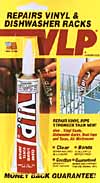
Waxed thread or dental floss can be used to sew the area and use VLP (Vinyl
Liquid Patch found at most hardware stores) or Plastiseam (found at most
hardware stores) to complete the repair. Both products are manufactured by
PDI, Inc. If the material is marginal at
best... you're better off to go ahead and replace it.
 |
 |
V.L.P. - Mend small holes and tears in your vinyl awning
fabric. Seals vinyl to help prevent further damage. Useful
for repairs on almost any vinyl product. Durable and
weather-resistant. Price about $3.
 |
|
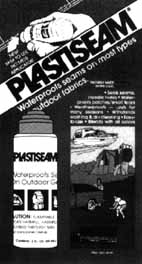
Plastiseam -
Waterproof seams on all types of outdoor gear. Plastiseam repairs
leaks and seals needle holes. Prevents rotting and unraveling
threads and remains flexible in all types of weather. Great for
waterproofing seams on tents, tarps, awnings, boat covers, backpacks and
much more. 2 oz. bottle about $5, 12 oz can about $17.
|
 |
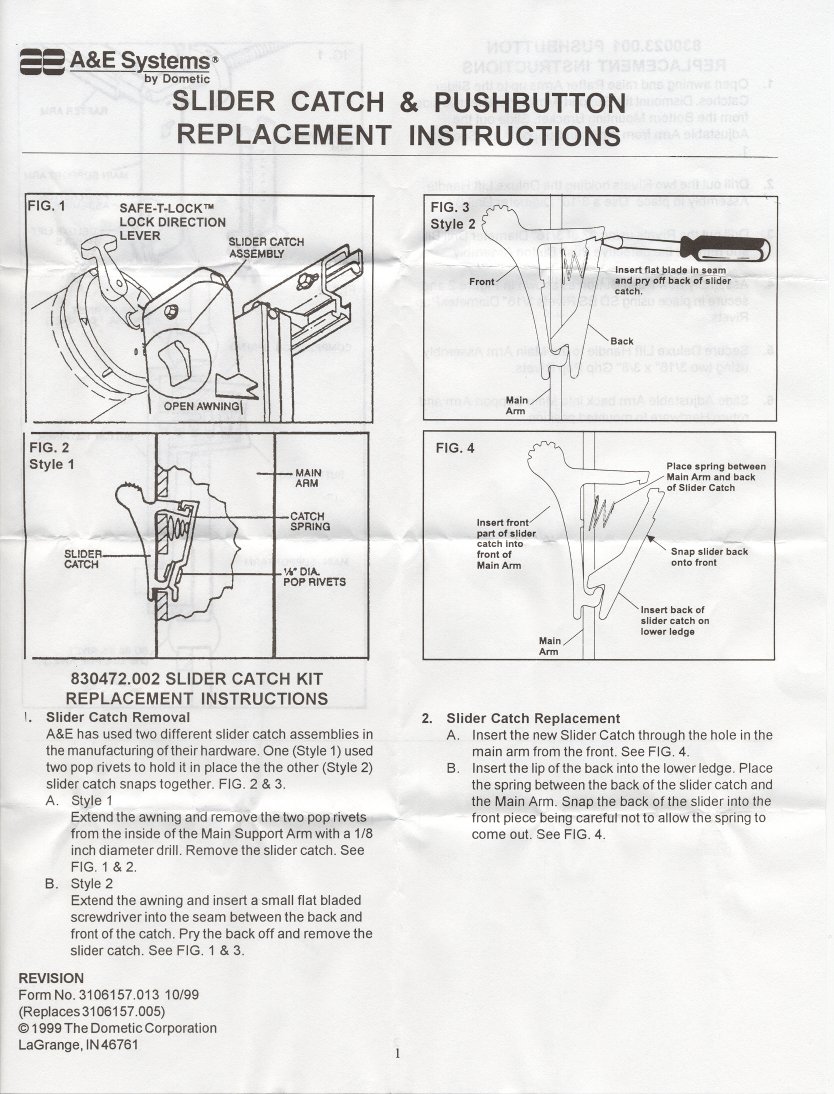
A & E Awnings have repair parts available to keep your awning in the best of
shape. One of them is the plastic awning support keeper that has a spring
in the middle of it. A set of these plastic wonders is now about
$10. Actually the part that usually breaks is the spring. You can
get one of these at the hardware store very inexpensively. I went to Ace
Hardware and they have those yellow boxes full of miscellaneous screws, washers,
spacers, and springs! #86 seems to be the closest and it costs a whopping
$0.50 each. I bought three of them to just have around since they were so
cheap. Here's how the
parts go together.
|
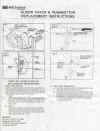 |
This is the repair sheet that A & E includes with
their parts. It will tell you what parts you need from A & E. |
Lighting
 |
Miniature Patio Lights make your campsite fun, festive and unique. Set
contains 10 weather-resistant Lights on a 14' cord. Includes replaceable safety fuse and
are double-plugged for connecting additional sets. Bulbs included, plus an extra bulb to
make the whole string flash. UL listed for indoor/outdoor use. 110V AC. 5"H. Ship Wt. 0.43 lbs.
|
At around $20 per set these lights are a popular decoration for your
RV awning. Awning hangers are available from several manufacturers for less than $10
per set. There are usually 7 hangers for some reason in a set. You may need
more than one to accommodate your light set.
Some of the standard patio light sets that are being sold have
a fuse in the plug assembly. Blow the fuse and there is a single extra
fuse there. Try to buy some of these fuses and you may well be doing some
hunting. Try asking for BUSSMAN GMA-5A for these lights. The fuses
are around a $1.50 apiece and are an electronic fuse that is commonly in
use. The bulb being used in these patio lights is a common 7 1/2 watt
Miniature Light (C7.5 or C7 1/2). You'll find them in your Christmas light
set also.
Party Lights
 A good spot to get those party lights for your rig.
 |
Insects & Animals
Troubled by insects... I'm starting an insect suggestion page here <CLICK HERE> Be sure to carry an insect repellent
with you. Something like  ,
Body
Guard®,
or Repel.
Citronella candles are used to 'fog' the air around a campsite and keep the
mosquitoes away.
,
Body
Guard®,
or Repel.
Citronella candles are used to 'fog' the air around a campsite and keep the
mosquitoes away.
Insect repellents often contain DEET.
DEET is a primary insect repellent and the link given will educate you about the
use of DEET. Chemical Specialties
Manufacturers Association - CSMA is the premier trade association
representing the consumer products industry.
Wild animals should be respected and stayed away from. Many times these wild animals
are 'uncivilized' are not going to like petting. The animals page will be here.
<CLICK HERE>
Pets are covered on the entertainment page at
<CLICK HERE>
Plumbing - Sewer
hookup, water hookup
Electrical - Getting power to the
right places in the right quantities
Rig - Basic additions to the unit itself you
may want or need
Kitchen - When you fix something to
eat it's just like at home with the same needs
Entertainment - Electronic or old
fashioned...
© 1998-2002 Roy Timberman
All trademarks are property of their respective owners.
www.timberman.com